This integration requires our Uniconta consultant to have access to your Uniconta system so that they can add the integration and set it up for you.
You can simply follow the guide below and then send the response back to your contact person at Risika.
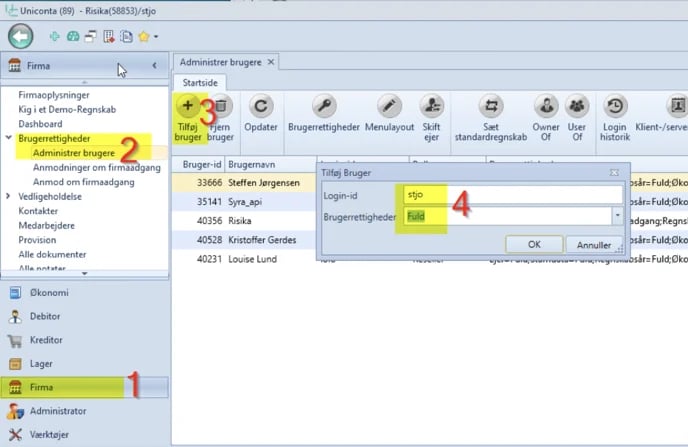
Provide access to Risika's Uniconta consultant
- Click on "Company."
- Click on "Manage Users."
- Click on "Add User."
- Enter the login ID and select user rights.
Login-ID: stjor@addpro.dk
User rights: Full
Additional Information
In addition, we need to know your accounting number. This can be found at the top left corner, just to the right of "Uniconta (89)."
If you have a test accounting system that we can use to test the integration before deploying it to your live system, we will also need access and the accounting number for that.
Setting up the integration
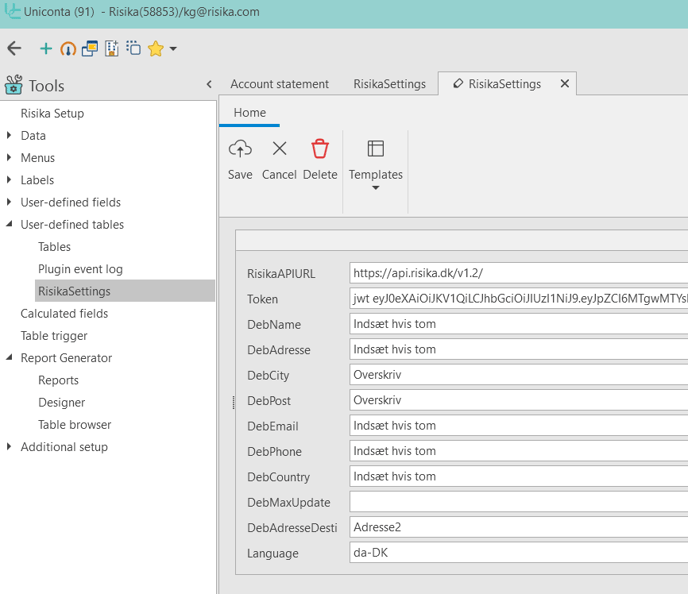
The Uniconta consultant should set up the most important information in this section. Primarily, the Risika API URL and Token are crucial for the integration to fetch data from Risika and input it into Uniconta.
If anything is missing in these fields, the following should be set up:
Risika API URL
The following URL should be inserted:
https://api.risika.dk/v1.2/
Token
This is your API token. Your token will contain a long string of numbers and letters. It is important that your token starts with "jwt."
Example of a token:
jwt XxXxX034XXxx38x8034XX9755X56X899X0xxX866X9x98x98442X
Remaining Fields
In the remaining fields, you have the option to configure how the integration updates master data on your debtors.
Need Help?
If you have any questions about the integration or if there's anything else we can assist with, please don't hesitate to contact us. You can reach us at support@risika.com or by using the live chat on our website.